The minute the temperature starts to drop in the fall, I tend to become completely obsessed with "hygge", which is the Danish and Norwegian word for making your space as comfy and cozy as possible. So naturally, my house is filled with candles. And if you're ever bought a candle before, you know all too well how ridiculously expensive they can be. This is why I decided to make some myself. To my surprise, it turned out to be much easier than I expect. This article will walk you through the step-by-step instructions for how to make scented candles at home.
We hope you find these products as awesome as we do. Just an FYI: We are a participant in the Amazon affiliate program, and may receive a share of sales from links on this page. Prices on Amazon fluctuate so anything mentioned below might change as soon we publish it!
From melting the wax to adding your scent and keeping your wick straight (the most important part!), this article will teach you how to make scented candles. Because a mason jar filled with wax shouldn't cost $29.99.
Need more hygge for your home? Look no further!
We hope you find these products as awesome as we do. Just an FYI: We participate in affiliate programs and may get a share of the revenue from your purchase.
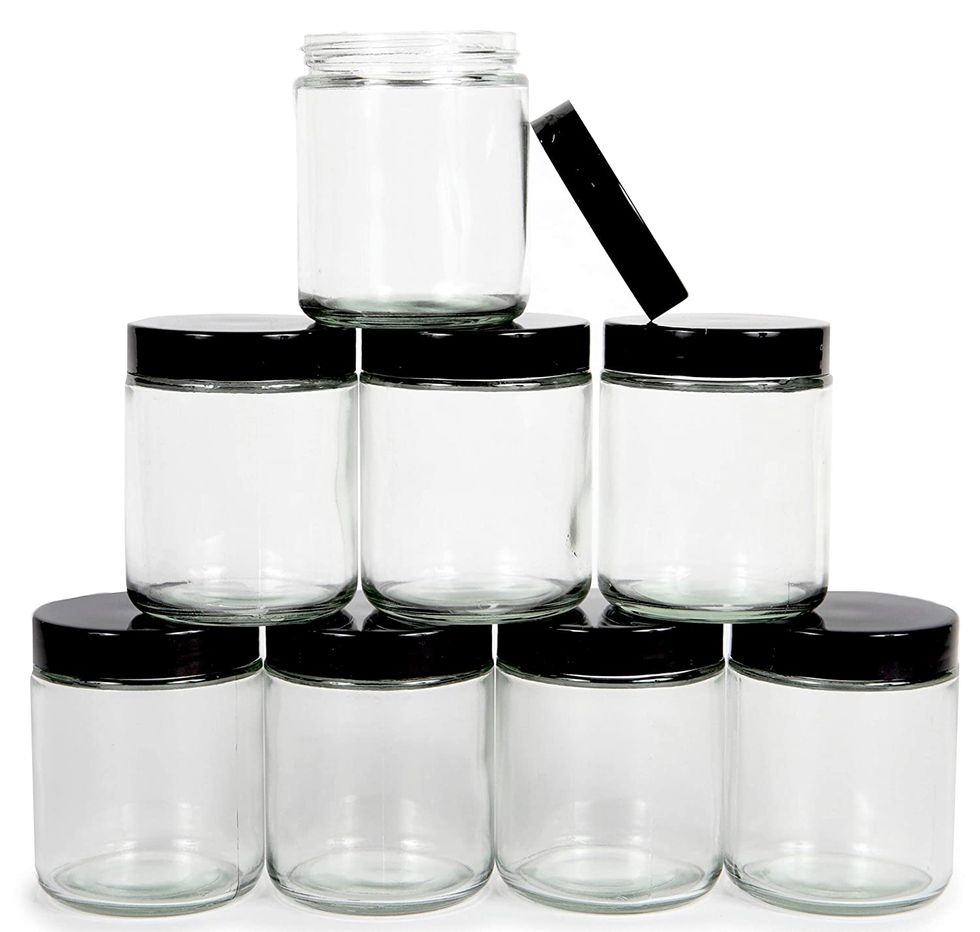
First things first, you'll need some glass jars.
via: Amazon
I like to use these VivaplexClear Round Glass Jars when I make candles because they're the perfect not-too-big, not-too-small size and have tight lids that make them great for gifting. Any glass jar with a tight-fitting lid will do, though. Wash the jars out before you start to remove any dirt or grit that might be at the bottom.Next, you'll need some wicks.
via: Amazon
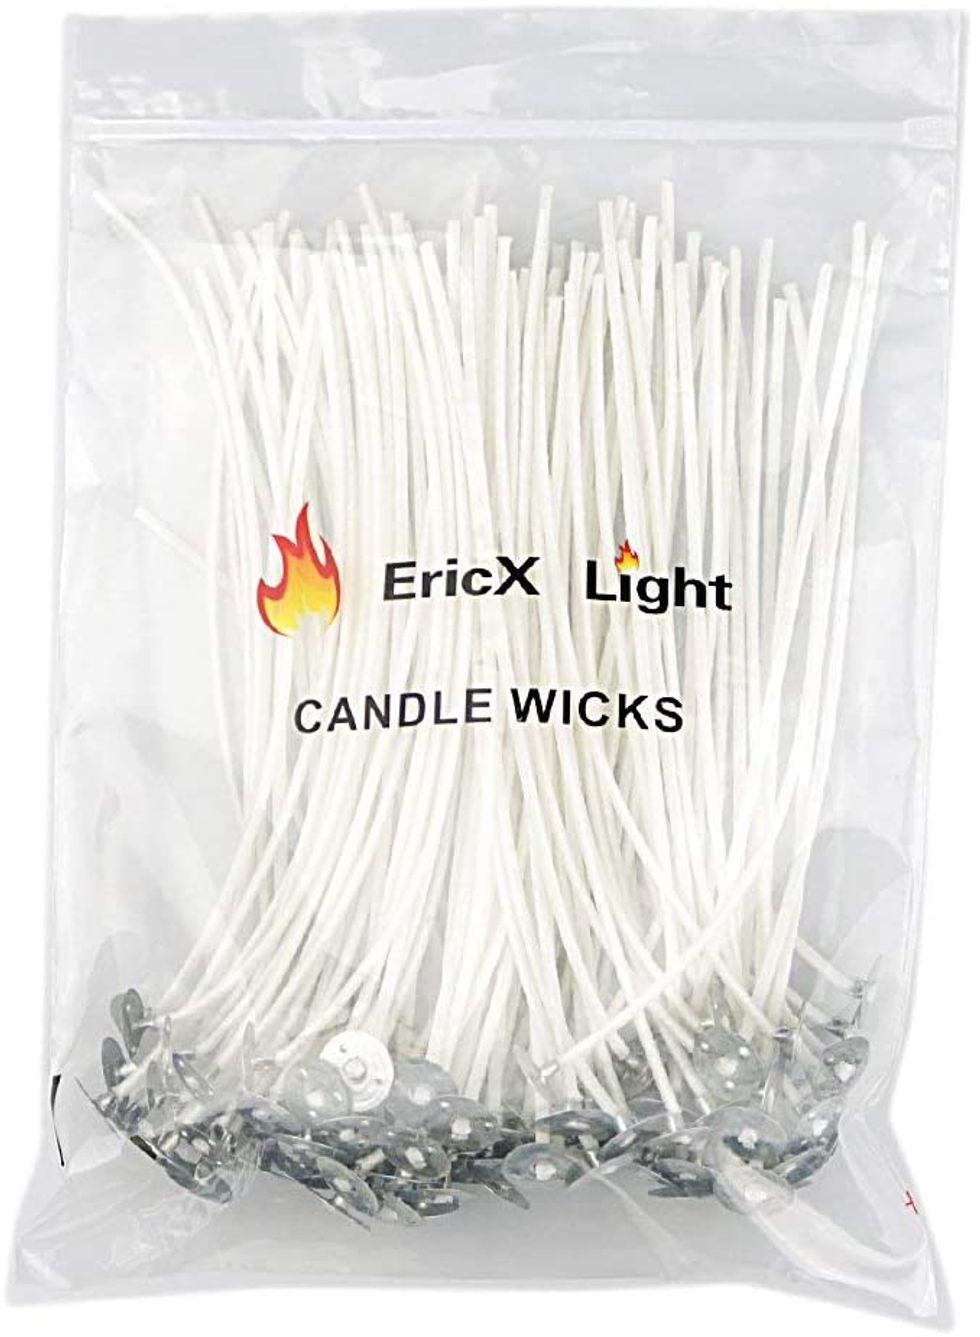
These EricX Light 100 Piece Cotton Candle Wick 6" Pre-Waxed for Candle Making are a great option because they're sturdy and incredibly cheap. You get 100 6-inch wicks for just over $6 bucks, which is an insanely good deal. They feature 100% cotton cords with 40 threads each for maximum strength.You'll need to secure your wick into the bottom of your jar with an adhesive.
via: Amazon
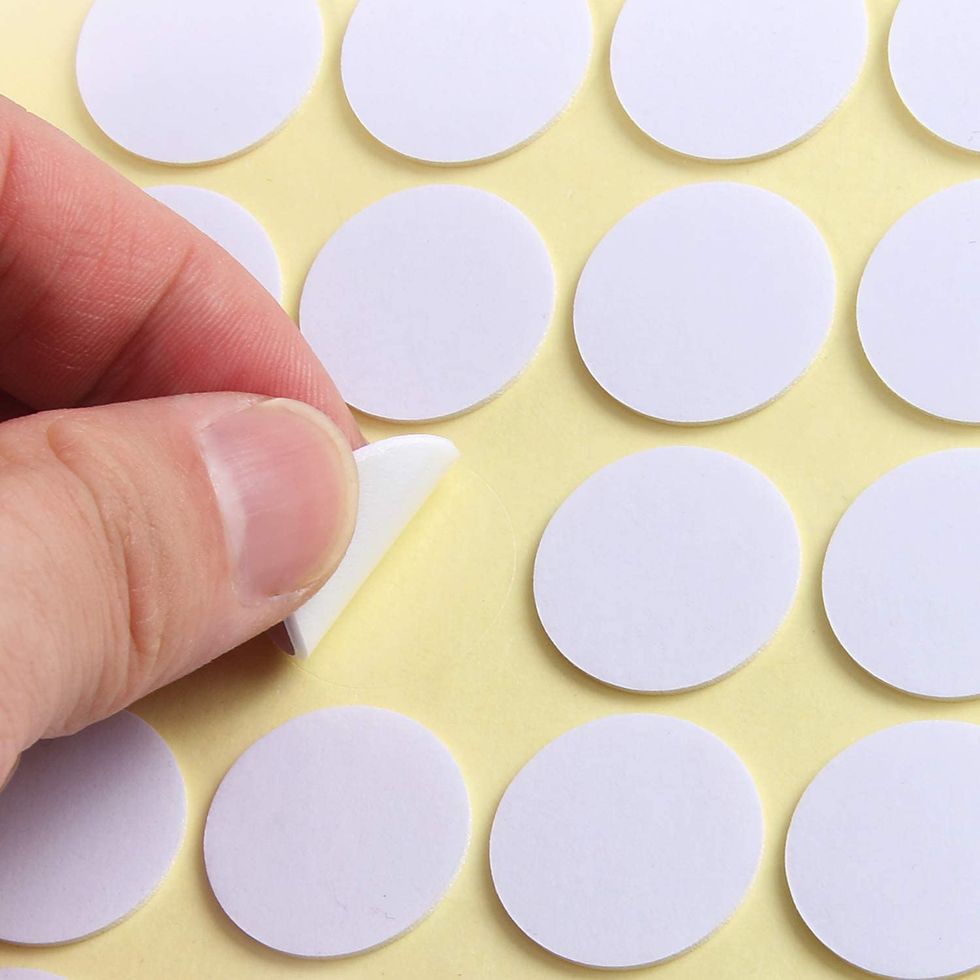
These 400pcs Candle Wick Stickers are heat-resistant, so they won't budge even after you've covered them in hot wax. Peel off the sticker and place one of the sticky sides underneath the metal disc at the end of your wick. Then, secure it to the bottom of your jar, being careful to get it as centered as possible.Keep your wick centered with one of these nifty gadgets.

via: Amazon
These EricX Light Metal Candle Wick Centering Devices are extremely useful tools than I didn't know about until a friend recently recommended them. Thread the end of your wick through the center hole and set it on top of your jar so it stands up straight on its own. This keeps it from shifting when you pour in your wax and throughout the cooling process.Now that your wick is secured, let's start melting!

via: Amazon
I highly recommend buying this EricX Light Candle Making Pouring Pot to melt your wax. After ruining several of my expensive pots, I finally decided to try out one of these melting pots and I've never looked back. Not only does it make your wax the perfect consistency, but the built-in spout makes it easy to pour without spilling it everywhere.Cut the top off of your 1-pound bag of wax and add the entire contents to your pouring pot.

via: Amazon
I love this CandleScience All Natural Soy Candle Wax. It's convenient, high-quality, and, at only $7.95 per 1-pound bag, a cheap and convenient option. Add your wax to the pot and start preparing your double boiler. Take a kitchen pot and add 1-2 inches of water and bring it to a boil. Once it's boiling, turn the heat down until it's simmering. Place your pouring pot into the water and hold it still so it doesn't spill.Stir the wax until it's completely melting.
via: Amazon
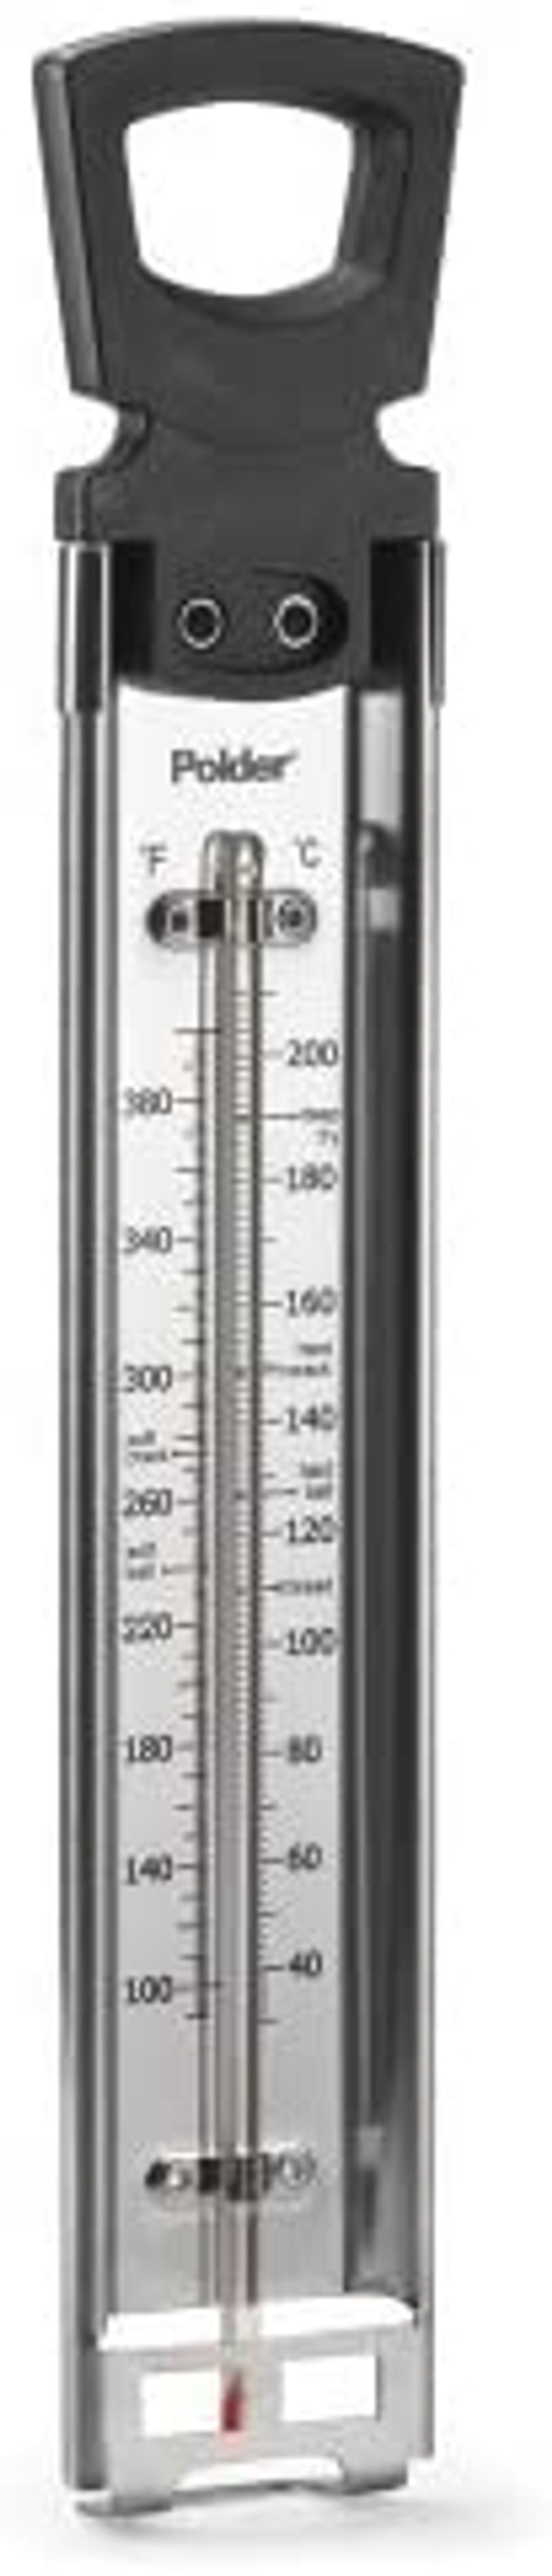
Once it's reached a liquid state, grab a thermometer like this Polder Candy/Jelly/Deep Fry Thermometer Stainless Steel with Pot Clip. Clip it to the side of the pot so it's only touching the melted wax. Once it's reached 180 degrees, it's time to add your scents and coloring.And now, for the best part of candle-making: adding the scent!
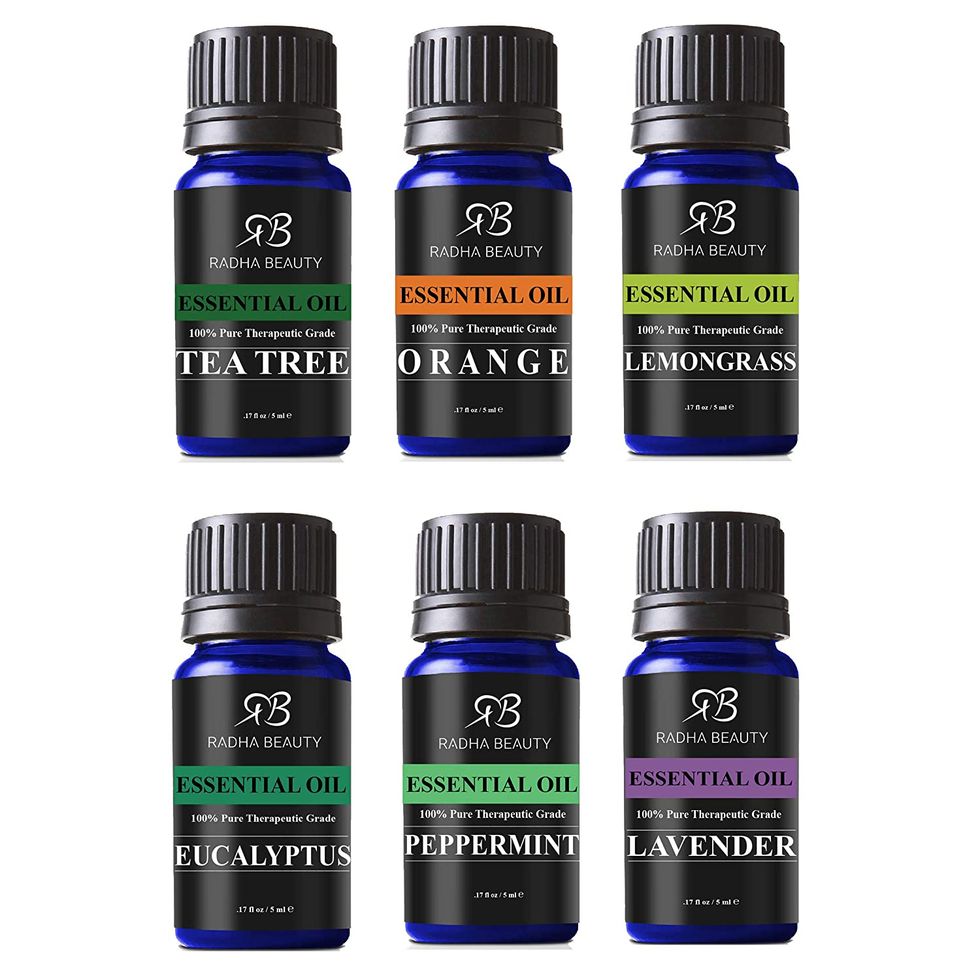
via: Amazon
This Radha Beauty Aromatherapy Top 6 Essential Oils includes tea tree, orange, lemongrass, eucalyptus, peppermint, and lavender. Choose your desired mix of fragrances and add between 1/2 to 1 ounce to your melted wax before stirring well to combine. Feel free to add more if you want your candles to be extra strong-smelling.While this next step is optional, it's always fun to add color to your candles.
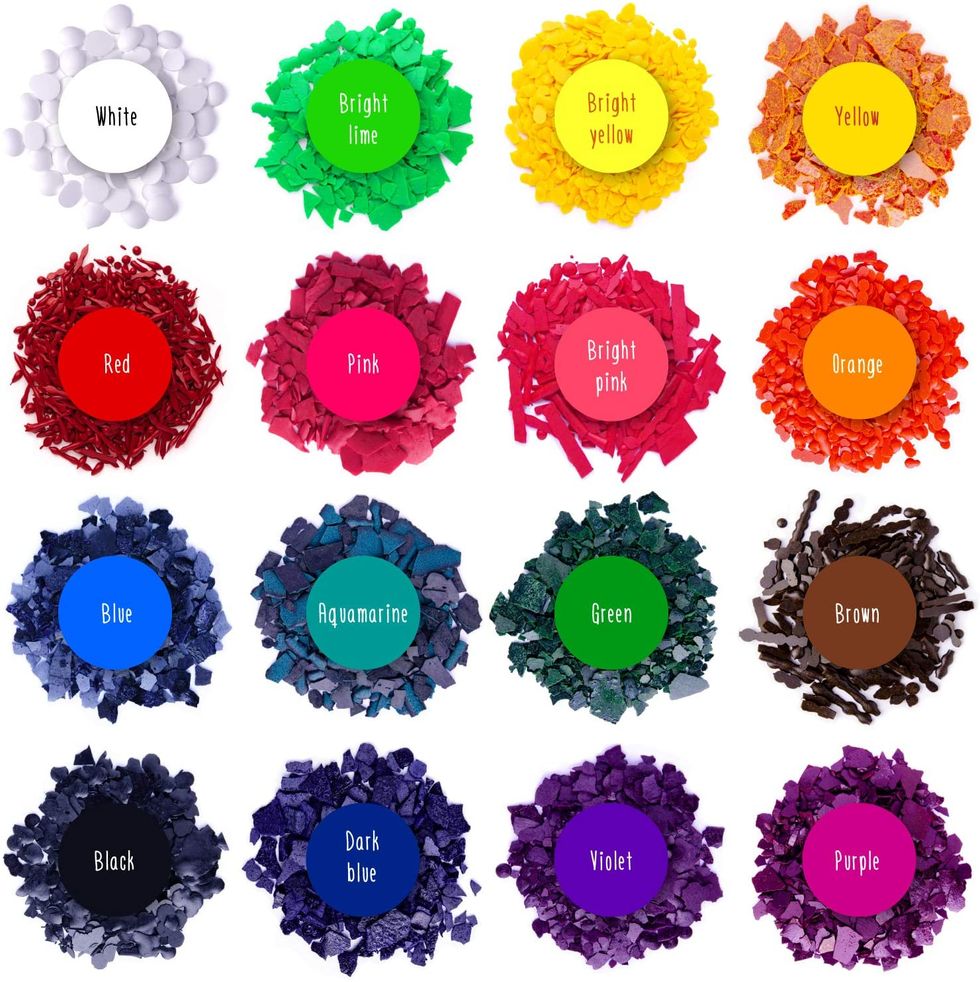
via: Amazon
Use these Candle Dyes Wax Dyes for Candle Making to your wax to add rich, gorgeous color. Choose your hue and add flakes slowly until you've reached your desired intensity, being sure to stir the entire time to avoid clumps. Allow your wax to cool until it's reached 140 degrees before pouring. Pour the scented and colored wax into your jars until it's about an inch from the top. Allow it to harden for 4 hours at room temperature. Top off your jar with a fresh layer of wax for a clean, crack-free finish.Allow it to harden completely before lighting for the first time.
via: Amazon
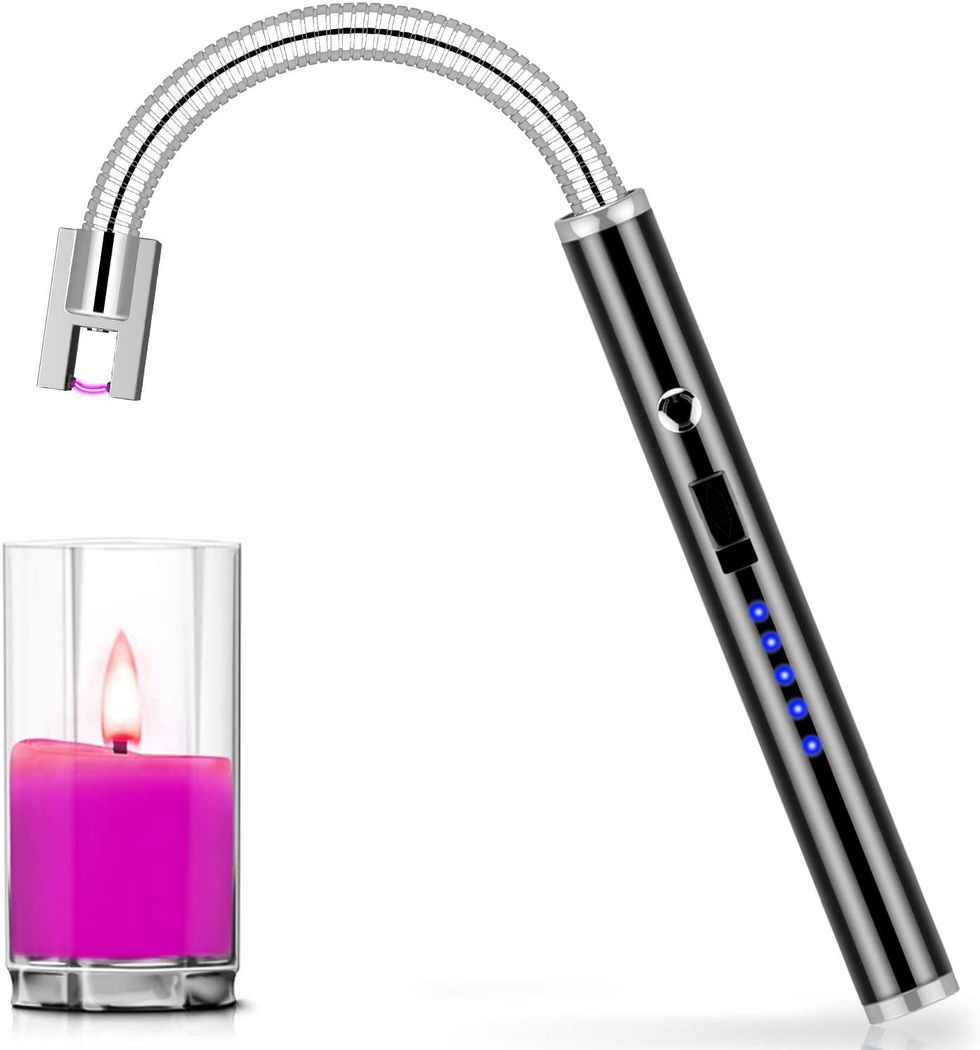
If your wick is longer than a half of an inch, trim it with a sharp pair of scissors. To light, I recommend this HiFan Candle Lighter, Rechargeable Electric Arc Lighter with 360° Flexible Neck. The bendable design makes it easy to light a variety of candle styles, and the flameless design looks straight out of the future. Master these steps and you'll be living the hygge lifestyle in no time!